Description
The perfect tea blend for your ‘buch!
Making kombucha at home? Or maybe you want to? This is the perfect blend to create the best ever kombucha! Recipe and instructions below! Make 2 gallons of kombucha per 1 oz of tea!
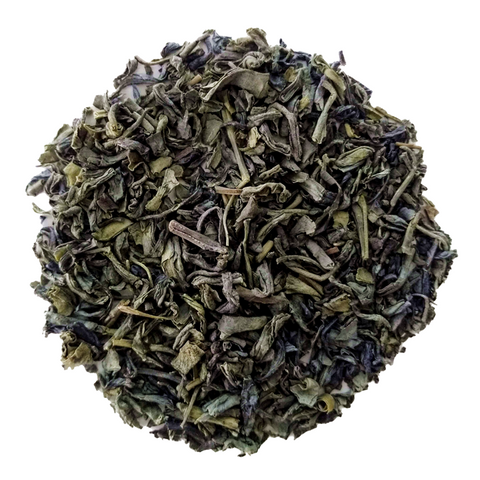
- *Chunmee Green Tea
- Oolong
- *India Black Tea
-
Caffeinated – *organic
Benefits
Green Tea: Astringent with plum-like sweetness "precious eyebrow"
- Boosts Metabolism
- Helps Fight Cancer
- Rich in Antioxidants
- Strengthens Immune System
- Supports Weight Loss
Oolong: Medium body with a light sweetness
- Boosts Metabolism
- Helps Control Diabetes
- Improves Mental Health
- Promotes Oral Health
- Rich in Antioxidants
- Supports Bone Health
- Supports Healthy Skin
India Black Tea: Light body with a slight sweetness
- Boosts Metabolism
- Promotes Heart Health
- Rich in Antioxidants
- Lowers Stress
- Promotes Healthy Brain function
- Strengthens Immune System
- Increases Physical Performance
- Increases Energy
Brewing Information
Why do we use 3 types of tea?
I (Jamah) was trained by the Kombucha Master in San Diego, and for 25 years he tested the best combination for the perfect brew. He passed that recipe onto me, and now I am passing it onto you! You can always use black tea (standard), but the complexity that the oolong & green tea offer along with the black tea makes the best buch! Everyone who tastes my kombucha says “why don’t you sell THIS?” “This is the best kombucha I’ve ever had” and so on…
How to make:
Fermented tea is easy to make yourself. I suggest you give it a shot since fermenting your very own unpasteurized fermented tea is awesome with so many benefits, especially when you consider the expense of buying from the store, $4/bottle vs. $4/gallon
What you need – brew by the gallon (easiest):
- 1 large glass jar (1 gallon is great) — Washed well. Avoid plastic containers or bowls because the synthetic substances in the plastic can filter into the fermented tea during the fermentation no bueno. Search for a large glass jar, extra large cookie jars work great!
-
Bottles for second fermentation. If you can get your hands on dark glass bottles with plastic lids, you’re money. Do not use plastic bottles, and try to stay away from metal lids (they can rust).
- 1 large piece of clean cloth (lint free, cotton, t-shirt or towel) — Secure the material over the opening of the container with an elastic band. Don’t use cheesecloth, as it is too porous, and particles/bugs could get into your kombucha. Tight-knit cotton works best.
- 1 funnel – to pour from large kombucha jar to bottles during 2nd fermentation.
- 1 large glass/measuring cup to use to pour kombucha from large jar to bottles (2 cup Pyrex measuring cup works great)
- 1 small mesh strainer (if you don’t want SCOBY particles getting into your second fermentation bottles).
- 1 SCOBY (Symbiotic Culture of Bacteria and Yeast) — You can find SCOBY’s online (just read the reviews, get a reputable one) or grab one from a friend, they will have plenty! A new baby SCOBY will grow with every cycle, you’ll end up with a lot of SCOBY’s! Tip: always keep your baby SCOBY, throw out the oldest SCOBY’s. After awhile they don’t ferment as well. babies are your friends!
- 1 cup of pre-made fermented kombucha aka “starter”, you must have this! Ask that friend for some starter when they give you a SCOBY.
- Find a home for your Kombucha. It needs good air-flow (counter-top is ideal), and keep out of direct sunlight. Don’t put your kombucha in a closet or cabinet, air flow is key.
Tip: Cleanliness is a must with kombucha, keep all tools washed/sanitized and hands very clean during the entire process. Pretend you’re in a lab doing an experiment, maybe you actually are, and you just one-upped all of us.
Put your SCOBY & starter kombucha in large jar, cover with cloth/rubber-band and follow the recipe below.
Note: You may very well find a lot of different recipes/instructions online. This was the recipe and process I was taught by the Kombucha Master who has been brewing over 25 years. Feel free to do your research, play around with different recipes. Kombucha isn’t hard and you can make it so many different ways.
Kombucha Tea Recipe:
- 3/4 gallon clean, purified or spring water is best!
- 1 cup Organic Cane Sugar (the sugar is what SCOBY’s thrive on, so be sure it is the real stuff). You can also use Honey, but cane sugar really is best for Buch!
- 18g (3 TBSP) Loose leaf tea
-
Extra-large or small reusable muslin tea bag(s) – optional
Instructions:
- In a large pot, boil 3/4 gallon purified or spring water.
- Once boiling, turn off heat.
- Add in loose leaf tea, either in a muslin tea bag or ball. You can also add it loose, just be sure to get all the leaves out before adding to your Kombucha Jar with the SCOBY.
- Pull your tea from mixture after 15 minutes.
- Let tea mixture cool to room temperature (usually takes a few hours). You should be able to easily submerge your clean hand into it. Don’t burn your SCOBY!
- Once cooled, pour into your glass jar with SCOBY & Starter Kombucha.
- Cover jar with clean cloth and large rubber-band
- Store in an area that has good air flow in your home (kitchen is ideal), do not put in a closed cabinet or closet. Your SCOBY thrives on oxygen as much as it thrives on sugar and tea. Keep out of direct sunlight.
First Fermentation:
- Kombucha fermentation times are different with every climate & even elevation. Typically Kombucha LOVES 70-80°F.
- If kept in a warm spot (out of direct sunlight) with proper air flow, you should be ready after 5-11 days for 2nd fermentation. Every temperature & elevation changes the amount of time for Kombucha. In San Diego my 1st fermentation was ready in 5 days, in Lake Tahoe it took 10 days. Colder temps take longer to ferment.
- Taste test! Feel free to taste your kombucha throughout the process to learn what works best for you. You want the 1st fermentation to be a little sweet, but not full-on sweet tea. You will start to taste the “vinegar” type flavor with a nice sweetness. You know you’re ready for 2nd fermentation.
Second Fermentation:
- Wash hands! Anytime you are handling your SCOBY or your kombucha, be sure to have super clean hands with no soap residue.
- Grab your bottles, mesh-strainer, funnel and measuring cup.
- Open up your big jar, you can remove your SCOBY for this process. Just pick it up and put it in a glass bowl with at least 1-2 cups of Kombucha, you’ll need this for your next batch.
- *Check section below if you want to flavor your kombucha. For pure kombucha, read on.
- Arrange your funnel in bottle opening, mesh strainer on top of funnel, and dip into the Kombucha with your measuring cup, pour into bottle. Leave 1-2″ room at the top to account for carbonation.
- Once you have filled all your bottles, seal them up (rinse if they got messy).
- Store in a warm spot for 3-5 days. Carefully open your bottle (carbonation could make it POP when opening) so open slowly and away from your face. Taste-test one bottle to see if it is ready. You’ll know when it’s ready when it tastes the way YOU want it. The second fermentation is where carbonation sets in. Carbonation is best when stored in a continuously warm 70-80°F spot.
*If your home changes temperature a lot, you may want to get a reptile/aquarium heating pad to place your bottles on, so it doesn’t dip below 60. (I had to do this when I moved up to the mountains, especially during winter months).
- PS. NEVER put chia seeds into your bottle during 2nd fermentation. You will have an explosion. This has been tried & tested, please learn from my mistakes.
Flavoring Kombucha: Only use pure juice or ingredients, never anything with added sweeteners, especially aspartame or artificial flavors/sweeteners.
-
Favorite flavors: Fresh Ginger Juice (blend ginger root and water, or use a juicer), Pure Cranberry juice, Pure Tart Cherry Juice, Hibiscus Tea (brewed very strong). You flavor your kombucha how you want it, play around, get creative. Just use organic clean ingredients.
- Pour desired juice/tea into the bottom of your bottles, filling the bottle 10-20% up with juice. You want the Kombucha to take up 80-90% of your bottle.
- Follow instructions above at step 5.
Storing Kombucha:
Once your kombucha is ready after the 2nd fermentation, put it in the fridge. This will pause the fermentation process and will be ready to drink once chilled. Your kombucha will stay fresh in the fridge for weeks. Drink within 3-5 days after opening a bottle. Fresh is best, so try to consume within a couple weeks!
Final note/disclaimer:
I am not a doctor, and will never claim to be one. I am a tea maker. I’m only providing the recipe and instructions I have used for years to make my personal kombucha. I have done extensive research on kombucha and it’s benefits, and suggest you do the same before embarking on your ‘buch making adventure. I am not listing the plethora of health benefits of kombucha, because again, I’m not a doctor and I wouldn’t want to claim anything that may cause you harm. Always talk to your doctor/naturopath or health professional you trust before drinking kombucha.